Managing Billing and Subscriptions
Learn how to manage your Uhura subscription, understand credits, view usage, and upgrade your plan. This guide covers everything you need to know about billing and payments.
Prerequisites
- An active Uhura account
- Owner role in an organization (for billing access)
Estimated time: 5 minutes
Navigate to Billing
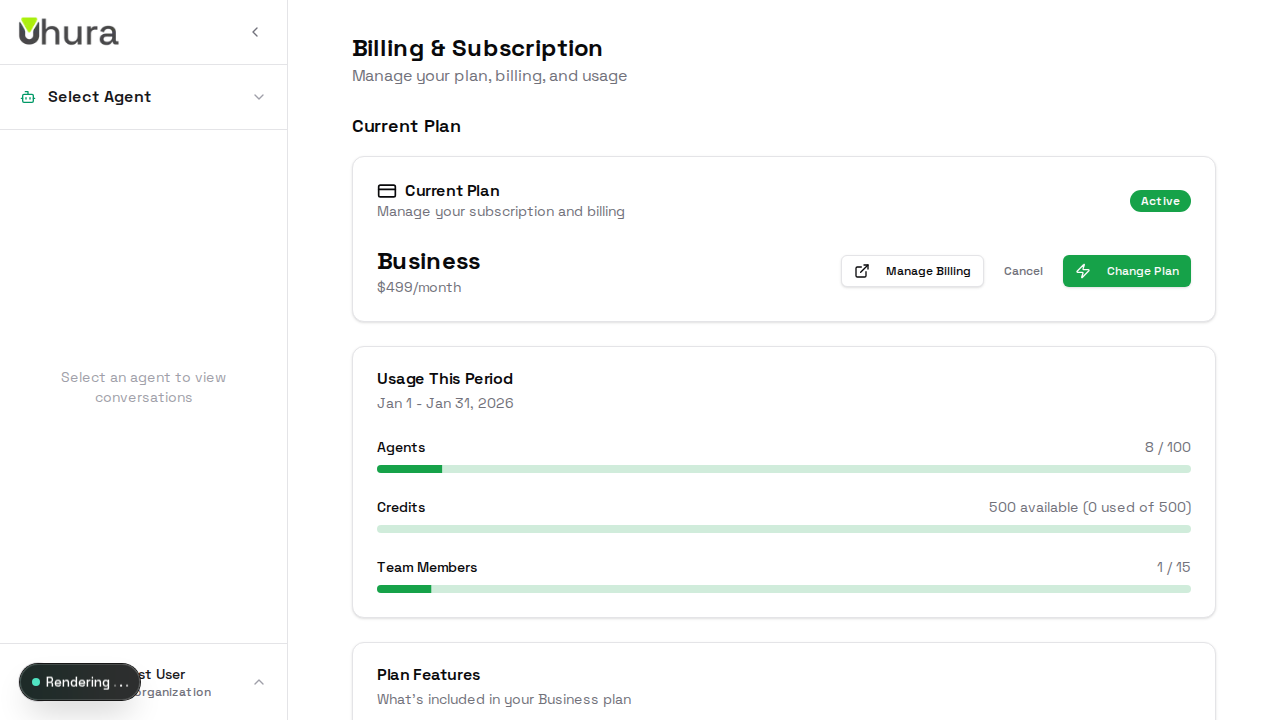
Go to Settings > Billing to manage your subscription, view usage, and purchase credits. This page gives you a complete overview of your plan and current usage.

View Your Current Plan
The billing overview shows your current plan (Free, Starter, Pro, Team, or Business), what's included, and your usage for the current billing period. Each plan has different limits for agents, members, and monthly credits.
Understand Credits
Credits are the unified currency for AI operations in Uhura. Each message, document processing, and AI analysis costs credits. Your plan includes a monthly credit allowance that resets at the start of each billing period.
Monitor your credit usage regularly. You can purchase additional credits if you run low before your next reset.
View Usage Details
The usage section shows how many agents and team members you're using compared to your plan limits, plus your credit consumption. Usage bars help you quickly see if you're approaching any limits.
When you hit a limit, you won't be able to create more agents or invite more members until you upgrade or usage resets.
Compare Plans
Scroll down to see all available plans and their features. Each plan shows the price, included agents, members, and monthly credits. Click "Upgrade" on any plan to start the checkout process.

The Pro plan is popular for growing teams. Business plan includes priority support and custom branding.
Upgrade Your Plan
To upgrade, click the "Upgrade" button on your desired plan. You'll be taken to Stripe's secure checkout to enter payment details. After payment, your new limits are active immediately.
Expected result: Clicking upgrade opens the secure checkout process.

Purchase Additional Credits
Running low on credits? Scroll to the "Purchase Credits" section to buy additional credits. These credits are added to your balance immediately and don't expire at the end of the billing period.

Purchased credits are used after your included monthly credits are exhausted.
Manage Subscription
Use the billing actions section to manage your subscription: update payment method, view invoices, or cancel your subscription. Cancellation takes effect at the end of your current billing period.

If you cancel, you'll keep access until the end of your paid period, then revert to the Free plan limits.